Beginner Photographer Series: Getting Started

So you’ve just unboxed your new camera, attached the kit lens, and charged the battery. Now what? If you thumbed through the owner’s manual while the battery was charging, you might have felt overwhelmed with all the features and buttons of your new toy. And it’s true, today’s cameras, be they mirrorless, fixed focal length, or DSLR, have so many options and shooting modes that it paralyzes you with too many choices.
While it is a good idea to spend time learning the ins and outs of your camera, you don’t need to take the time right now if all you want to do is go out and shoot. And let’s be honest, that’s likely anyone reading this right now. Who doesn’t like to use new toys as soon as they get them? There are some easy settings for your camera that you can use to get going right away.
Using Your Camera in Full Auto Mode
The first and easiest mode is Full Auto. This is likely indicated on the mode dial as a green rectangle, or the word “Auto.” This essentially turns your camera into a point and shoot. For most brands, this means your aperture, speed, and ISO will be determined automatically by the camera. This will give you the least amount of creative control but it will enable you to start using your camera right away. And you will get some great shots in this mode, just not on a consistent basis.

Full Auto Mode Indicators
For the Best and Easiest Way to Use Your Camera, Put it in Aperture Priority Mode
Auto mode is by far the easiest mode to get started with, but as stated above, you don’t have much control. To get to the sweet spot, the mode that will give you creative control but also ease of use, I recommend putting your camera in Aperture Priority mode. This will most likely be marked with “Av” or something similar on your mode dial. To use this mode correctly, you will need to learn about what aperture is and how it affects your pictures.

Aperture Priority Mode (Av)
The Aperture is the size of the hole in the lens. Inside of each lens are several aperture blades and when you move your lens from f/3.5 to f/16, the aperture blades close down to a small hole, which allows less light in. When you change it back to f/3.5, the hole is much bigger, and therefore, lets in lots more light.
I’m not going to get into minutia in regards to aperture and light. All you really need to know is that if you are taking someone’s portrait, or want the background of your subject to have that blurry look, then you want the aperture of your lens to be around f/5.6 or less (the lower you go below f/5.6, the blurrier your background will be). However, if you’re taking a picture of a vast landscape, and want the entire picture in focus, then you need to set your lens aperture to f/8 and above (a lot of landscape shots are taken at f/11).

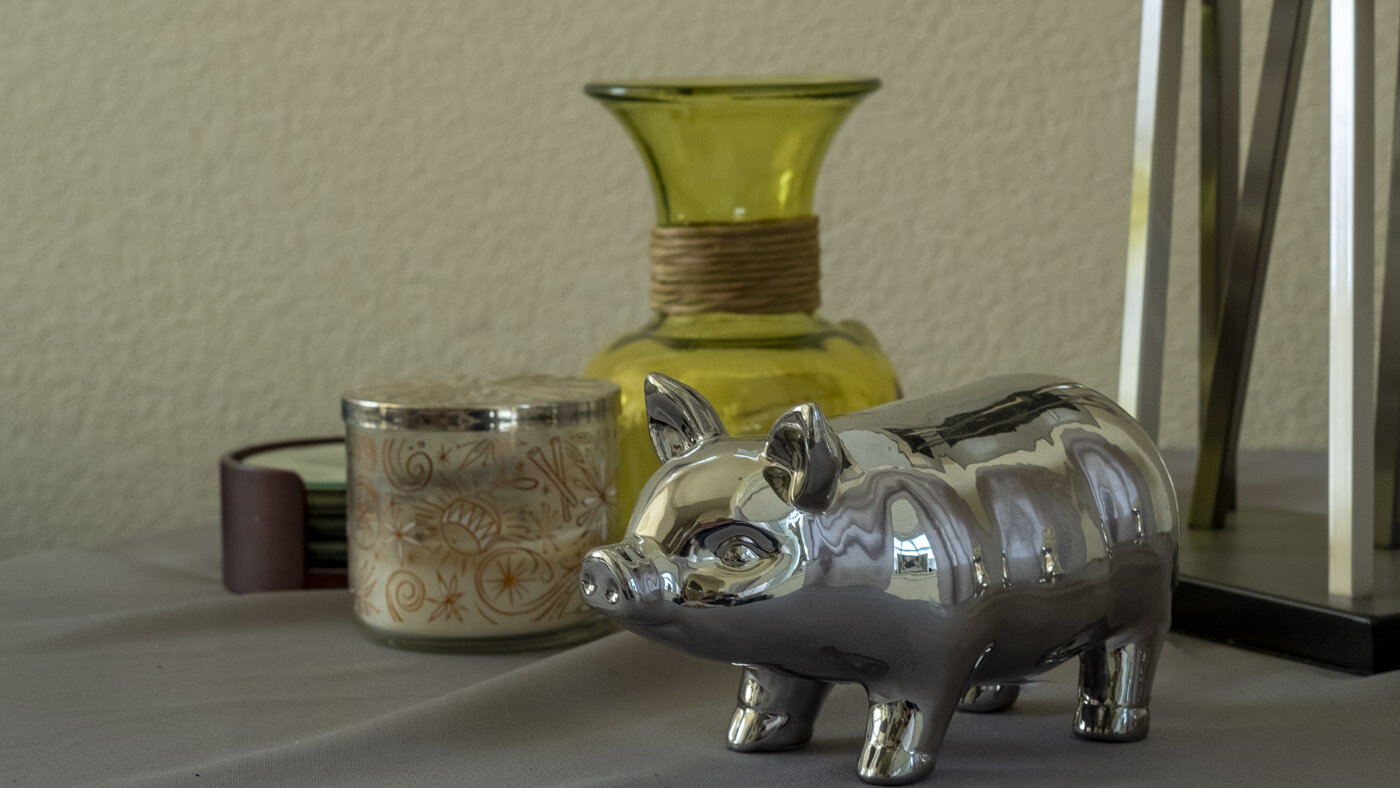
Taken at f/2.8. Notice how the pig is in focus but the background is not.
Taken at f/8. Everything is more in focus. The wall would be more in focus if this was taken at f/11.
The thing to remember in aperture priority mode, and in all modes, really, is the amount of light available. The wider the aperture, like f/2.8, the lower the light quality needs to be in order to still take a good hand held picture. If you’re indoors with the blinds drawn, and you want to take a photo with everything in focus at around f/11, you’re likely going to end up with a dark and grainy image. The reasons for this are beyond the scope of this post, but as you use your camera more and more, you will learn just how much light is needed in order for a photo to turn out okay. It’s usually a lot more than you think.
Now Get Out There and Start Taking pictures
This is a first in a series of posts that will help you use your camera and get more creative as we go along. For now, these tips should enable you to start using your camera immediately. The best location to start is your own home. Take pictures of family members, friends, pets or just still life around the house. Start to notice how the light plays off of different objects. And remember, no one has to see any of these photos, so don’t be afraid to make mistakes. A LOT of mistakes. That’s the only way to get better at photography.